Overlay - a service layer on the image containing textual and numerical data about the study Active Overlay - the part of the overlay that controls certain program functions, depends on the specialty and presentation mode (2D/3D)
Highlighted in yellow
To select a function, click on the active overlay item with the left mouse button
Displaying an Overlay on the Screen
Toggle the overlay representation on screen by pressing the key on the keyboard sequentially, or using the buttons in the Toolbar - "Image Processing" Group:
Show entire overlay
Click to display the entire overlay on the image (default)
Hide personal data
Click to hide patient and institution data in the overlay
Show only Active Overlay
Click to hide all data in the overlay except for image control
Hide all overlay
Click to completely hide all overlay elements
To quickly hide/show all overlay elements, you can use the keyboard shortcut
Active Overlay
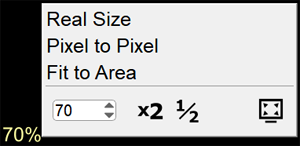
Bottom Left Corner in 2D Mode
Click on the required size in the list, enter a numerical value in the field, or click on the arrows next to it
The button applies the size to all images on the screen
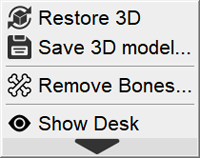
Bottom Left Corner in 3D Mode
MPR
Select MPR construction method (Average, MIP, MinIP):
Click on the current MPR construction method (white arrow)
Click on the required construction method in the list
Change Slab Thickness
Move the mouse cursor over the slab thickness slider
Press and hold the left mouse button
Move the slider to the required position
Release the mouse button
You can also enter a specific number in the field to the left of the slider
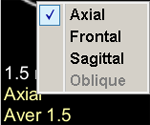
MPR Projections
Click on the name of the current projection in the active overlay, then, in the appeared list, click on the item with the required projection
The "More" icon calls up the image preset editing menu
See Image Presets
The "Print Image" button in the "More" menu sends the image to the print sheet
Additional Buttons by Modality
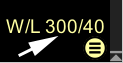
CT
WL selection menu
Click on the required WL in the list
Quickly set the same WL values in different series:
Click the button
The WL value of different series will become the same


 key on the keyboard sequentially, or using the buttons in the Toolbar - "Image Processing" Group:

 button applies the size to all images on the screen
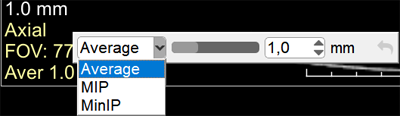
 calls up the image preset editing menu
 in the "More" menu sends the image to the print sheet