An overlay is a service layer on the image containing textual and numerical data about the study
To configure its display in the application, go to Specialties Settings and click the "Overlay" button
Expression Display Areas
The window that appears is divided into 4 areas, corresponding to the corners of the image (scan, projection)
If it is necessary to also use the sides of the image, click on - show additional areas, in the lower right corner of the window
Modality Selection
By default, the Overlay settings are shown for the modality of the active material (on screen)
If necessary, you can select another modality
The modality dropdown list is in the lower left corner of the window
If the overlay of the modality being edited does not match the active one (the one on screen), the modality name will be highlighted in yellow
Displaying Expressions
In each of the areas, expressions are listed as rows, as they are defined in DICOM
In the right corner of the expression row, there are control buttons:
- The expression is NOT shown on screen and/or in print
- The expression IS shown on screen and/or in print
- Remove the expression
A quick way to hide the expression on screen and in print
The expression will remain in the general expressions list
- Add a new expression to the area
Selected from the appearing general expressions list
Move an Expression Up, Down, or to Another Corner
Hover the mouse cursor over the expression
Press and hold the left mouse button
Drag the expression by moving the mouse
Release the left mouse button
Orientation Letters and Scale
Show orientation letters and scale
Check the corresponding boxes to display them on screen and/or in print
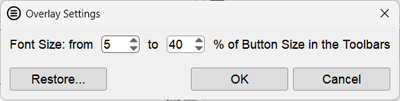
Overlay Font
The "More..." button in the lower left corner of the window allows you to set the Overlay font size
Engineering Functions
The "Add Modality" and "Delete Modality" buttons next to the modality dropdown list in the lower left corner of the window, as well as the "Expressions" button, are intended for the engineering service
Incorrect use of them may lead to serious consequences
Restore Overlay to Default Values
The "Restore" button allows you to restore the Overlay for the selected modality to its default values
Saving Changes or Discarding Them
All changes made are saved by clicking the "OK" button. Clicking "Cancel" discards the changes.
See also
 - The expression is NOT shown on screen and/or in print
 - The expression IS shown on screen and/or in print
 - Remove the expression
 - Add a new expression to the area
 in the lower left corner of the window allows you to set the Overlay font size