The "Ground Glass" program is designed to quantify dense areas in the lungs in the form of "ground glass":
segmentation of lung tissue
calculation of the volume of both lungs, the right and left lungs separately
determination of the average density value of lung parenchyma, standard deviation and median
calculation of the volume and percentage of ground-glass opacity areas
histogram of lung tissue distribution by density
3D model with color mapping of ground-glass opacity areas in halftones
Launching the Ground Glass Program
Click on the toolbar, in the "Studies" group, on the "Programs" button or press the key on the keyboard
Click the "Ground Glass" button
Selecting a Series for Analysis
In the window that appears, click the down button
Select a series in the "lung" reconstruction mode and click on it
Click the "OK" button
Selecting a Mode for Analysis
In the window that appears, click the "Advanced Analysis" button
Program Interface
The screen will be split into 5 panels:
three panels with standard MPR display
3D model panel
control panel with histogram and results table
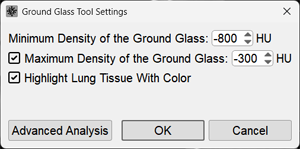
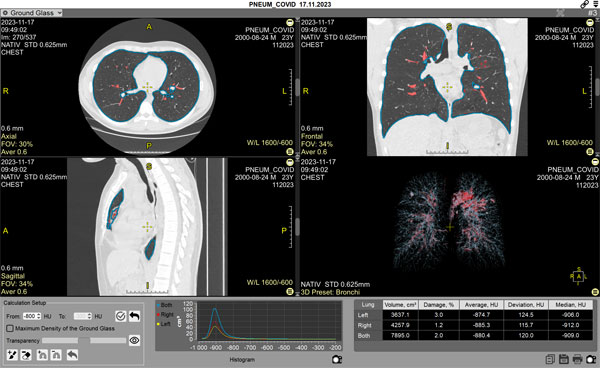
The program will automatically perform lung segmentation and calculate ground-glass areas based on the default threshold
Automatically identified ground-glass areas are colored red
Settings for Quantitative Analysis of Ground Glass Areas
Control buttons for program settings are located in the lower panel, to the left of the histogram
Setting Ground Glass Area Thresholds
Options for changing the ground glass area threshold:
Click on the numeric value field and enter numbers from the keyboard
Click the arrows next to the numeric value field to change the threshold
Click the checkbox next to the "Maximum Ground Glass Density" item if you want to consider it in the calculation, and enter the value in the corresponding field in a similar way
Applying the New Ground Glass Area Threshold
Click the button to the right of the numeric fields
Reverting to the Default Value
Click the button to the right of the slider
Coloring Control:
Move the transparency slider (on the left, at the bottom) to the right
or
Click the "Show/Hide Pathological Area Coloring" button / in the control panel
to check the correctness of the automatic coloring
Editing Ground Glass Area Coloring
Click the "Delete Zone" button to remove an unnecessary area, or the "Add Zone" button to add an unaccounted area
For both functions (deletion and addition):
Outline the necessary lung fragment on any of the MPR projections
Actions are similar to the "Closed Pencil" tool of the program
Scroll through the images, selecting all areas to be edited
Undo the last edit - the last button in the row .
Editing Lung Segmentation (Extraction)
If the automatic lung extraction had errors, use the buttons:
and (add or remove lung area)
For both functions (deletion and addition):
Outline the necessary lung fragment on any of the MPR projections
Actions are similar to the "Closed Pencil" tool of the program
Scroll through the images, selecting all areas to be edited
Results of Ground Glass Area Analysis
Presented as a density histogram and a table of lesion volumes in the center and right part of the lower panel
Saving Results
Saving within Vidar Dicom Viewer
The Ground Glass program is automatically saved upon exit in the Finds list
To display it on screen, click the "Ground Glass" item in the Finds list in the Preview Bar
Saving the Results Table
If the region of interest (rows or columns of the table) is not selected, then all table data is saved
Click the "Copy" button to copy the table to the clipboard for subsequent pasting into a standard text document
Click the "Save" button to save the analysis results table to a *.csv format file for subsequent use in MS Excel
Click the "Print" button to send the analysis results table for printing
Saving the Histogram
Click the "Save Histogram" button under the histogram to save it to a user series (it will be located in the Preview Bar at the end of the study)
Subsequently, it can be dragged onto the screen and printed
Saving the Entire Screen (Images, Histogram, and Table) to a User Series
Click the "Save User Series" button under the table to save the entire screen to a user series (it will be located in the Preview Bar at the end of the study)
Exiting the Ground Glass Program Mode
Click the "Ground Glass" button in the program header on the left