Oblique Projections
An oblique projection is constructed using 3D lines
See 3-D Cursor and 3-D Lines
Rotating a 3D Line
Hide/Show 3D Lines
- Click on the toolbar, "3D" group:
 3D lines will be hidden from the image
- Click on the toolbar, "3D Navigation" group:
 3D lines will reappear on the image
Hide/Show 3D Lines and 3D Cursor
- Press the
 key on the keyboard to hide 3D lines and the 3D cursor
Press it again to display them
Rotation Using Two Mouse Buttons 
- Position the mouse cursor over the image
- Press and hold the right, then the left mouse button
- Rotate the image by moving the mouse
- Release the mouse buttons
Dependence on Selected Material
- In two-dimensional images - X-ray, mammo, 2D representation of volumes, etc. - only 2D rotation is available
- In the 3D model, only 3D rotation is available
- In MPR, two types of rotation are available:
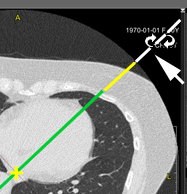
2D rotation (in one plane) - move the mouse cursor to the edge of the image until it changes to 
3D rotation (in all planes) - move the mouse cursor closer to the center of the image until it changes to 
Rotation Using One Mouse Button
Click on the toolbar, "Processing" group, on the "Rotation" button  , or press the key combination
  +
+  on the keyboard
2D Rotation (in one plane)
Rotate the image in the plane of the screen:
- The mouse cursor must be on the periphery of the image and look like this
- Press and hold the left mouse button over the image
- Move the mouse to rotate the MPR in the plane of the screen
3D Rotation (in all planes)
Rotate the image in all planes:
- The mouse cursor must be in the central parts of the image and look like this
- Press and hold the left mouse button over the image
- Move the mouse to rotate the MPR in all planes
See also
Vidar Dicom Viewer Help 3.0, © 2026
PO Vidar