The program is designed for analyzing the lumen of the colon in computed tomography
The program automatically
segments the colon
builds the centerline of the colon
presents an endoscopic mode and a dissection view
It allows localization of the pathological process on MPR and 3D reconstructions and indicates its distance from the anus
Measurement of the pathological process size is performed on MPR reconstructions
Saving the reconstruction results into a user series
Adequate patient preparation is necessary for the program to work correctly
Launching the "Virtual Colonoscopy" Program
Click in the tool panel, "Studies" group, on the "Programs" button
Click on the "Virtual Colonoscopy" button
The screen will split into 4 panels to display the colon:
dissection view with a 3D cursor and a camera position cursor in the form of a vertical line on it
endoscopic mode (endo mode)
axial MPR projection with a 3D cursor
3D model of the segmented colon with a centerline and a schematic representation of the camera as a bell
To the left of the display panels - the control panel:
Bowel - if automatic segmentation erroneously cut off a part of the colon, left-click to place a checkmark next to the cut-off (no checkmark) fragment
It will appear on the screen
Length - indicates the length of the colon from the anus to the dome of the cecum in mm
Position - indicates the camera position from the anus in mm
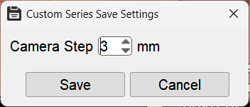
Clicks on the up/down arrows and entering a number in the field allow precise movement of the camera
Move the camera faster using the slider located below, or by holding the left mouse button on the camera "bell" in the 3D model and moving the mouse
Buttons and start the video mode from the anus to the cecum dome and back
Button places a 3D marker
Buttons and switch the current view to MPR+3D mode and back
In the Finds field, placed markers are located
Camera Control
Manual Control
Use the camera position slider (from the anus)
Use the arrows to the right of the camera position number
Use the slider in the endoscopic mode panel
Use the vertical line on the dissection panel
Use the camera image ("bell") on the 3D model
Automatic Control (Playback, Video Mode)
Button from the anus to the cecum dome
Button - in the opposite direction
Evaluation of Pathological Foci
Detection of Pathological Foci
In the active overlay of the endo mode, click the mouse to select Colon Lumen
Pathological foci will not be colored
Measuring Pathological Foci
Using the button place 3D marker on the pathological focus in the endo mode
The 3D marker and 3D cursor will appear in the area of interest on all panels
Using the button switch to the MPR+3D view
Press the key if the 3D marker and 3D cursor interfere with measurements
Return to the colonoscopy mode by clicking the button .
Marker List
Placed markers are added to the Finds list in the program panel
Selecting a Marker
In the marker list, left-click on the button "Marker 1" (2,3...)
Renaming a Marker
Hover the mouse cursor over the marker in the list
Left-click on the "Rename" button
Deleting a Marker
Hover the mouse cursor over the marker in the list
Left-click on the "Delete" button
Saving Results
Saving Reconstructions in Vidar Dicom Viewer
Virtual colonoscopy is automatically saved upon exiting the program
in the Finds list
To display it on the screen, click on the "Virtual Colonoscopy" item in the Finds list in the Preview Bar
Saving for Transfer to Patients and Other Medical Institutions
Click on the "Virtual Colonoscopy" button in the upper left corner of the series header
In the menu that appears, select the item - "Save the Resulting Series", and click on it
Set the camera step along the colon lumen
The saved series is located in the Preview Bar, at the end of the study
Viewing the saved user series in Vidar Dicom Viewer is done by manual or automatic scrolling
Exiting the "Virtual Colonoscopy" Program Mode
Click on the "Exit mode" item in the "Virtual Colonoscopy" menu
The screen split will return to standard