If necessary (if the program is launched for the first time), edit the found nodules in the previous study
Click the "Add series for comparison" button in the "Lung Nodules" program panel of the previous study
Drag the series of the current study into the appeared window and click the OK button
The screen will be split into 4 panels:
left - previous study,
right - current study
Note: In case of technical problems with the 3D model (low computer performance), click the button in the series header
The 3D model will not be shown
Click the button to show it again
If you need to keep these settings for future use, click sequentially:
The "Lung Nodules" button in the left corner of the series header
Settings in the drop-down list
The checkbox next to the "Show 3D" item
The icon .
The "Yes" button in the appeared window - "OK"
Automatic Nodule Search and Nodule Pair Creation
The program will automatically identify all nodules in the current study and create pairs of nodules
Nodules located in the same location in different studies will have the same color and number
Possible causes of inaccuracies are similar to those observed in the "Lung Nodules" program
Disabling the Automatic Nodule Detection Mode is similar to that described in the "Lung Nodules" program
Navigating Through Nodule Pairs
Clicking the name of a paired nodule in any of the nodule lists shows the nodule pair in all 3 projections
Clicking the text block of a paired nodule on any of the 3 projections shows it and its pair in both nodule lists
Clicking the name of an unpaired nodule in the nodule list shows it in all 3 projections
Clicking the text block of an unpaired nodule on any of the 3 projections shows it in the nodule list
Manual Nodule Editing
Manual nodule editing, editing nodule shape, and editing nodule name are similar to those described in the "Lung Nodules" program.
Manual Editing of Nodule Pairs
In case of discrepancy between the patient's breathing phases in different studies:
Disable synchronization with the button in the program panel
Scroll the axial projection of one of the studies until the nodes are visually aligned
Enable synchronization again with the button
Correcting Automatic Creation of Pairs for New Nodules
When manually adding new nodules to both studies, a prompt will appear:
Confirm or decline automatic creation of a new pair by clicking the corresponding button
Correcting Program-Created Nodule Pairs
1. Splitting an Erroneously Created Pair
Click any nodule in the list, or on the axial projection, that has a pair
Such nodules have identical numbers, are located in the upper part of the list, and are separated from the others by a horizontal line
Click the "Cancel Pair" button on the program panel
In the appeared window
confirm or decline splitting the pair by clicking the corresponding button
2. Creating a New Pair
Click any nodule without a pair in the list, or on the axial projection of one of the studies
Such nodules have different numbers and are located in the lower part of the list below the horizontal line
Click any nodule without a pair in the list, or on the axial projection of the second study
Click the "Create Pair" button on the program panel
In the appeared window
confirm or decline creating the pair by clicking the corresponding button
Analyzing Lung Nodules
Click the button "Nodules Aalysis" in the program panel
A fifth panel will be added to the described ones, representing a table with the main parameters of each pair of nodules
Clicking any cell in the table leads to displaying the corresponding nodule pair
Clicking the name of a paired nodule in the nodule list, or the text block of a paired nodule on any of the 3 projections, shows the pair's row in the table
Data from the table can be copied by clicking the button
Return to nodule search - click the "Nodules Search" button in the program panel
 .
. button in the series header
 button to show it again
 button in the program panel
 button
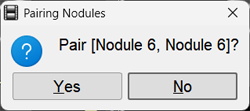
 on the program panel
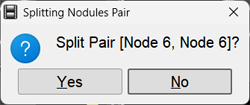
 on the program panel
 button